
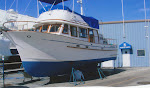

The white stripe is cleaned with bleach....not painted............


The hole without a hose leading to it was one of two drain holes for the bridge area that were under the bridge “wings.” The brass that is showing was not originally there. The holes had previously allowed for moisture to penetrate into the wood of the boat on both sides (port side is just forward of the door, starboard side is just about between the two windows.) Mike cleaned out and enlarged the holes and fitted in the brass drain tubes so that the water can still get out but it cannot penetrate the wood of the boat. The hose is connected down to a new drain hole we drilled. This one connects up to the ice box which previously drained out to the floor under the bridge – no hose, etc. Mike also added additional insulation to the bottom side of the ice box where there was none.


We replaced the plastic lights in the v-berth with small brass lamps.


The table arrived! Thank you Gordon and Cathy for finding and shipping this to us! Any guests for drinks or dinner or those making the seating area into an overnight berth will be most grateful as well! This picture shows that the settee upholstery is still in process.

Also two of the speakers for the stereo can be seen here. There is also one next to the pilot’s seat, one in the aft cabin and two up in the bridge. The stereo unit itself is under the pilot’s seat near the starboard entrance. There is a plug that leads from the stereo to a cord inside the “nothing drawer” where an iPod can be plugged in.

We installed a 12-volt plug to charge cell phones, iPods, etc. This is located just inside the v-berth so that items can rest on top while charging and it kept wires close together instead of strung far and wide.

Finally! The v-berth cushions are done. The settee seating is still in process but at least we can cross the v-berth upholstery off the “to-do” list. This was scheduled to be done the first of November (all, not just the v-berth) and only the completed v-berth and pilot’s seat were delivered at the end of December. Even with all of the projects we have going on the boat it has been our biggest source of frustration.

The next big project is window removal. We are removing all of the aft cabin windows (five) and four windows in the main cabin – two over the galley and two over the settee. There was broken glass in three windows and we had water damage concerns from others. We are having new windows built with screens in all the opening units (seven of the nine.) The glass will be lightly tinted to aid in keeping the cabins cooler. We knew this was going to be a major project and has required all available hands. The adhesives were like tar and some of the exterior teak was so dry that it wouldn’t come off in one piece. And, because of the damaged glass, the windows did not come out without broken glass.

The window removal process (repeat nine times):
• Remove 14 teak bungs (chip out the teak plugs)
• Clean out the screw heads that were under the bungs
• Remove the screws
• Pry, chisel and scrape a section of exterior teak window trim off the glass and fiberglass while scoring and cutting away all of the black adhesive holding it on – and any newer silicone adhesive that was used to prevent leaks

• After the teak is removed, there are another 14 screws that are in the fiberglass. The adhesive must be cleaned out of those to remove them
• Remove glass panes – this required more scoring and cutting away of adhesive and hoping that the glass wouldn’t break in the process.
• Remove window tracks and blocking (again pry, chisel, scrape)
• Remove interior teak trim (more prying, chiseling and scraping)
We were able to save all of the interior teak trim except for a few pieces in the head. We plan to replace that with a starboard trim instead of teak since it is in the shower stall.
We have teak on hand to build new exterior window trim after the new windows are installed.
• Hang plastic over the window openings to keep dust out of the interior
• Lightly sand the gel coat to remove excess adhesive and old varnish
• Sweep up the mess
• REPEAT NINE TIMES!
What a great job.
ReplyDeleteI could use a bit of help.
I just bought a 1985 Albin 36. I replaced the window over the nav station/desk in the aft cabin, stbd...no problem, it popped right out. However, I'm replacing the saloon windows and am stumped getting the first one removed. Do I understand you to say that the outside molding comes off separately from the window frame? My internal molding is fine and I'd like to leave it in place.
Second question...The boat was in NY (now in Florida) and there is serious cracking of the fberglass in the vicinity of the chainplate over the port side doorway. Water weeps out of the cracks when it rains. I suspect water intrusion from the bridge deck seam into the coaming around the chain plate (and it then froze and cracked when up north). Does leaking through the deck seam sound logical to you (I haven't seen inside there like you have).